Sealing Can (Recessed) Lights
Sealing Can (Recessed) Lights
most can lights are not airtight
A common question is whether or not it’s OK to install AtticFoil™ brand reflective insulation directly over can lights or other types of recessed lighting, when installing Radiant Barrier Directly Over Attic Insulation. These types of lights are also called “pot lights” in some areas.
The problem with can lights is they are usually NOT airtight. This means that air can easily move from inside the home into the attic directly through the can light.
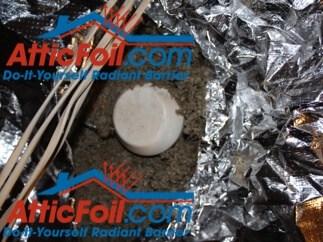
Usually the air inside the home is relatively warm and moist when compared to the air in the attic. In cold weather, the foil inside a vented attic is usually pretty cold. When warm moist air comes in contact with a cold surface (the radiant barrier) you get condensation. Condensation occurs when water in a vapor form converts to its liquid form. This water can turn to ice if it’s cold enough. The last thing we want is water or ice forming under your radiant barrier foil.
You must always use perforated radiant barrier foil when installing directly on top of existing attic insulation. In colder climates we recommend using the SuperPerf™ AtticFoil™ on top of existing insulation. Learn more about SuperPerf™ radiant barrier here.
How Do I Prevent Condensation Under Radiant Barrier?
You have two options: seal and make the can lights airtight, or cut a hole in the radiant barrier to allow the warm-moist air to BYPASS the foil insulation. Your first choice should be to seal the can lights. When you think about it, can lights are just 6″ holes in your home, also called the “thermal enclosure.” This is equivalent to going up to your refrigerator and drilling a bunch of 1″ holes in it. Sealing can lights is probably one of the best things you can do to help reduce air infiltration and reduce heat gain/loss into the home.
In fact, you want to seal ANY hole in the ceiling that allows a path for warm-moist air to go directly into the attic. Check areas around light fixtures, ceiling fans, smoke detectors, and air conditioning ducts and registers.
Method #1: Seal the Can Lights
Sealing can lights can be done by several methods. You can install new “airtight” lights that you can bury under insulation. These are labeled ICAT (Insulation-Contact-Air-Tight). These lights will provide both air sealing and a thermal barrier, when correctly insulated. Other options include making a foam box or enclosure (buckets, cans, etc.) to place over an older “leaky” can light and then cover it with insulation (see the photo at the top of the page).
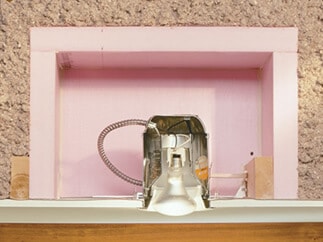
These enclosures can be sealed to the sheet rock with a can of foam. The box (or enclosure) will provide the air sealing, and the space between the light and the enclosure will create the required space between the light and any insulation to dissipate heat and keep the lights from overheating. Another option is to install an airtight trim kit. These are little cones that install from the bottom to provide a seal around the bulb and the sheet rock. Changing to CFL bulbs also significantly reduces the heat generated by can lights.
This picture illustrates using foam board to create a box that fully encapsulates the can light. The box is airtight and is sealed to the sheetrock with a can of foam. The box is several inches away from the can and will provide a space required for Non-Insulation Contact Can lights. Once the box is installed and sealed to the sheetrock, then additional insulation can be put on top.
Method #2: Cut Holes in the Radiant Barrier Over Can Lights
If in doubt, cut a hole in the foil. Unless you are SURE your can lights are airtight, you should cut a hole about 12″ round in the radiant barrier foil directly above the can lights. This will allow any air leakage with warm-moist air to bypass the foil and prevent it from getting “trapped” below the foil. For many customers this is the easiest and safest way to prevent any potential moisture problems. Don’t worry about any decrease in the effectiveness of the radiant barrier.
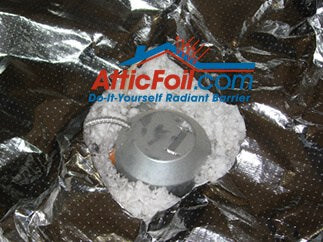
Cutting a few holes in hundreds or thousands of square feet of radiant barrier will have only a trivial impact on its performance. To further reduce the risk of trapping moisture, if you’re in a cold climate we recommend using SuperPerf™ AtticFoil™ over your insulation since it’s designed with larger holes for maximum breathability.
Cutting a hole is the radiant barrier foil is not ideal, but it is much better than getting condensation below the foil. If you think your can lights are leaky, cut a 12″ hole directly above them.
Duct & Air Sealing
leaky ducts are a huge energy waster!
At AtticFoil.com we would LOVE to sell you some radiant barrier foil. However, our FIRST priority is to help you save money and make your home more comfortable! If you have an older home check the ducts for leakage before you ever think about buying radiant barrier or more attic insulation. If your air ducts are leaky, several things can be happening. Leaks on the SUPPLY side push hot or cold air INTO the attic instead of your home.
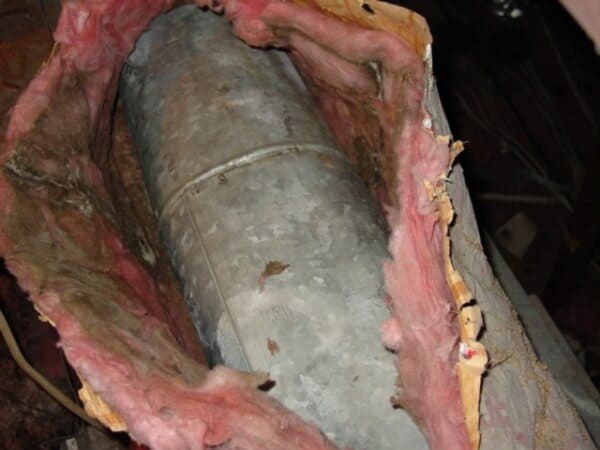
This is money wasted and causes outside air to be pulled into the home due to negative pressure. Leaks on the RETURN side cause hot, humid dirty attic air to be drawn directly into your air conditioner. This is like running a hair dryer in your refrigerator and will cause the home to be hot, humid and inefficient.
The key to preventing ANY moisture problems is to seal, seal, seal holes in the ceiling under the foil. If you can prevent the water vapor from condensing then there is usually never an issue to deal with. Oftentimes customers lean on the conservative side and cut holes in the radiant barrier above potential moisture spots to allow extra drying potential (ability for water vapor to pass through).
Older ducts, especially metal ducts, are notorious for leaking. Studies show that there is generally a direct correlation between the age of the duct system and the percentage of duct leakage. Additionally, wrapping a duct with insulation does virtually nothing to reduce duct leakage; it’s like wrapping a leaky pipe with a rag – even if it slows down the flow, it still will not completely stop a water leak.
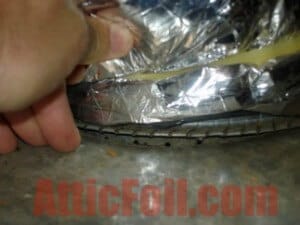
The duct collar should be sealed with duct mastic to prevent air leakage and make an air tight seal.
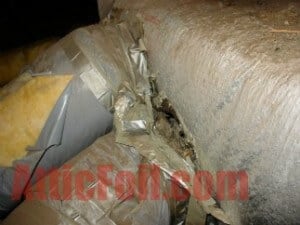
Old ductwork separated from the plenum box can be seen in this photo.
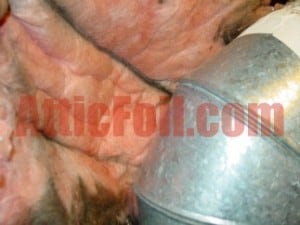
The dark line on the insulation is caused from years of air being pushed out of the metal seam.
Energy Saving Tips:
Check for leaky ducts.This is probably the most overlooked area on most homes. If the air in your ducts were water, your attic would probably fill up within a few minutes. In California, they require duct testing/sealing to be performed with the installation of a new A/C unit – read about it here. Many homes (even newer homes) have duct leakage of over 15%; in older homes with metal duct work, the leakage is usually OVER 50%! Don’t waste your time on radiant barrier or insulation until your ducts are tight.
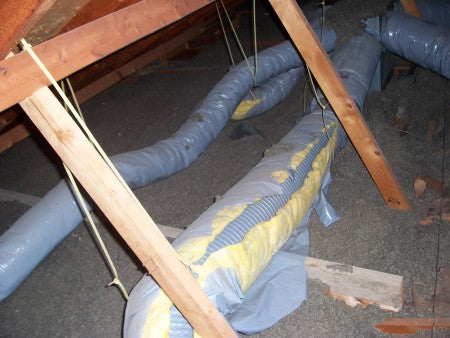
Here are some industry study results on duct leakage and other air conditioning problems.
Find possible sites for air infiltration/holes in your home. Once again, think of your home like a refrigerator. It does not matter how much insulation you put on it, until you close the door it’s going to run all the time. Can lights, attic doors, windows, doors, etc., anyplace air can get in needs to be inspected. Seal them up!
Inspect areas of thermal bypass. Thermal bypass is is a term for places where heat is entering your home; these are essentially bald spots in the homes insulation or thermal envelope. You can reference the Thermal Bypass Checklist at the EPA/EnergyStar website. If you have a 2 story home please read section 4: Walls Adjoining Unconditioned Spaces.
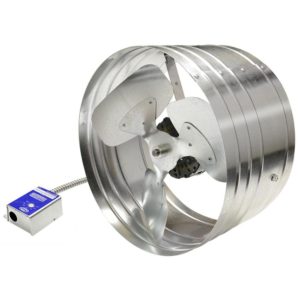
Check attic ventilation. Radiant barrier will reduce the heat getting in, but you still need good airflow to help carry the heat out. Attic ventilation is very simple: holes in the top of your attic (i.e. wind turbines, static vents or attic fans – which consequently we do not recommend) and holes in the bottom of your attic (usually in the form of soffit vents) that are clear and open. You must have both! Air cannot move out unless it can move in from the bottom. Electric attic fans usually just suck the cold air out of your home, which is why we typically recommend passive systems for attic ventilation.
Windows that catch sunlight. We hate to tell you this, but windows, and especially west-facing windows, are a brutal source of heat gain. As a rule, a home’s heating/cooling bill is always directly proportional to the percentage of window surface area. The best windows have an R-Value of about 3 to 4. Even low-e double pane windows are a gap in the thermal envelope that allow heat to enter or escape. What can you do? If a window catches direct sunlight, then we recommend you invest in some solar screens or really good professional-grade window film (nano-ceramic window film) as it will make a huge difference.
Six Myths About Attic Ventilation
Here are six of the most common misconceptions about attic ventilation. Read on to find out what you need to know about attics, soffit vents, passive vs. active ventilation, and what you really need to do to have a well-vented attic space that stays cool and dry.
1. If I have roof vents, I have good attic ventilation.
If only it were that simple! We believe that the most effective ventilation uses a ridge vent and soffit venting for the attic. However, this doesn’t mean that if you don’t use a ridge vent your ventilation is kaput.
Honestly, any type of “holes” in the top of the attic will work.
A good goal with attic ventilation is to have a balanced amount of air coming in to the attic as you have of air leaving the attic; it is also ok if you have a little more air coming in than you do going out (ie. lots of soffit venting). Soffit venting is your main source of intake for an attic. These vents allow cool, dry air to enter the attic at its lowest point and as air travels up and out the higher points (ridge, turbine, gables) so that the airflow removes warm, moist air from inside the attic.
However, if your soffit vents are dirty or clogged then you will have little to no airflow through the attic.
2. More ventilation is always better.
More is not always better. The thought process goes something like this: “If I add an electric/solar attic fan to my roof, I can help pull out more hot air from the attic and it will be cooler.”
WRONG! Choose one type of exhaust vent and go with it because mixing exhaust vents is a bad thing. Air always travels the path of least resistance. When you mix exhaust vents on a roofline, the strongest vent will dominate the air pull and those other exhaust vents will turn in to INTAKE vents. This short-circuits the whole concept of air coming in the bottom and out the top.
For example: If you put an electric fan right next to a ridge vent or other passive vent, air can easily come in the ridge vent instead of the soffits. This defeats the whole purpose of having low/high vents.
While having plenty of intake (soffit) venting is good, having too much exhaust can actually hinder your goal of cooling the attic air temperature.
3. The best way to get air moving in an attic is by using powered vents.
A simple passive system (uses no energy) will work just as well (for free) as a powered (active) system and in almost all instances has the benefit of being silent. We generally don’t promote the use of any sort of powered fans because they’re typically very costly, and the solar ones only work on sunny days.
What most people don’t realize is that it’s usually pretty breezy at the top of the roof. You may not notice the breeze lower down on the ground between houses or fences but that doesn’t mean air isn’t moving. With a little breeze two wind turbines can easily pull out as much air as an electric fan can.
If you choose to go with the fans, just be sure you also add plenty of intake to FEED those fans air (via soffits). If you don’t, the low pressure in the attic will suck air from the house. This happens all the time with power ventilation & sometimes it will actually make the comfort/efficiency worse.
This is because without an intake source, the air in your attic is depressurized and although it can be hard to predict where the “makeup” air will come from, it’s likely going to come from inside your home. The net result is that your home feels warmer faster, so your air conditioner has work harder than ever just to try to keep things comfortable (ie. huge energy waster!).
If you have ever had an electric attic fan motor burn out it’s probably because of the high static pressure put on the fan by lack of (or dirty and clogged) soffit (intake) vents.
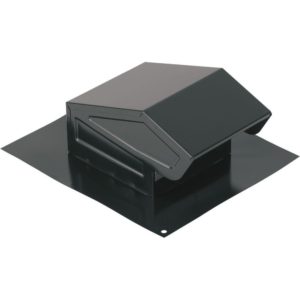
This is a standard static roof vent used in a passive ventilation system.
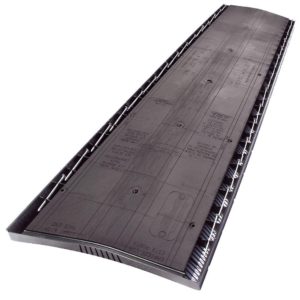
Ridge vents are common vents used at the peak of the roofline.
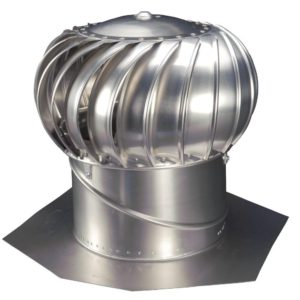
This wind turbine (also called a whirly bird) moves when you have good intake at the soffits.
4. Roof vents suck out warm air from my house in winter.
It’s easy to think this when it’s ripping cold outside and the attic feels “warm.” However, it’s not likely your vents are to blame. The best way to determine if the attic has significant leaks from the inside of the home is to measure the air temperature at night, after the sun has gone down. If your attic is well insulated, the actual temperature of the air inside your attic should be very close to the ambient (outside) temperature.
Since most homes are leaky, it shouldn’t be too surprising that some warm air is escaping the attic insulation.
In fact, ventilating attic spaces in winter months is actually just as important as venting them in summer! Why? Because in the winter you constantly have water vapor from the inside of the home drifting upward to the attic space. If this vapor doesn’t dry quickly or get exhausted to the exterior atmosphere, you can have big problems. When vapor condenses inside an attic space, water can drip from the underside of the roof and, if the temperature gets low enough, frost (or even ice!) can form inside the attic and ultimately lead to wood rot and mold growth.
The best way to combat this is to SEAL your attic floor (under the insulation) in any areas of obvious leakage. Then, make sure your attic floor has the recommended level of insulation for your area. Finally, if you’re trying to reduce heat loss from the home into the attic, you need to consider adding a radiant barrier over your insulation on the attic floor to help the home from radiating heat into the attic space. Our SuperPerf™ radiant barrier is an excellent choice, especially in cold climates where moisture is a significant concern.
Learn more about installing radiant barrier foil on top of attic insulation here.
5. I can see light from the soffit vents, so they must be open and working. (Or I see the vent covers on the eaves outside under the roof, so I know I have soffit venting.)
Even if you can see soffit vent covers on the outside of the house, this does not mean there is cool air going into the attic. More often that not, soffits are blocked in the inside of the attic by insulation or framing and sometimes a vent cover is installed on the outside of the house, but the soffit behind it isn’t even cut out, or not cut out all the way, to fit the vent.
Just because you can see light from the soffit area when you’re inside the attic, doesn’t mean the soffit is clean and unobstructed.
The best way is to get up under the soffit vent with a flashlight and see if it’s clean and the hole is cut big enough. If it’s dirty, that is a good sign that air was/is moving through it. Now you just need to clean it to get it functioning properly again. Use a brush to clean the screen and then use a leaf blower and put the nozzle up to the soffit vent to blow off any insulation or other stuff on top of the screen inside the attic. Don’t remove the soffit vents unless you plan on cutting larger holes and installing new vents.
If the vent is clean then it may be blocked on the top with insulation or other stuff. Use a leaf blower and blow from the bottom to clear off the top. For more info on how to clean your soffit vents, check out my video on fixing the number one problem in attic ventilation (hint: clean your soffits!).
Baffle vents are intended to keep the soffit vent clear and promote air flow, but if they’ve been installed incorrectly, they can be part of the problem too!
6. If I have good enough ventilation, I don’t need radiant barrier in my attic.
You would need TENS of THOUSANDS of cubic feet of air per minute passing through the attic to get the temperature to drop. So while it is *possible* to lower attic air temperature with ventilation alone, this will have little to no effect on how hot your house is getting.
This would be like blowing a giant fan on your sunny driveway and expecting it not to be hot.
If you install a radiant barrier, it will drop the SURFACE temperatures inside the attic compared to the air temperature in the attic. This is really what drives heat flow – the top SURFACE temperature of the insulation. It can easily be 120º or more even if the AIR temperature is only 100º. So no matter how close the attic air temperature is to the outside air temp, you still need to reduce the radiant heat gain into the attic if you want to cool off your home. Learn more about air temperature vs surface temperature in attics here.


